Group Grid Items
You can drag and drop column headers to the dark blue bar on top of the column headers to group and display grid items by the dropped column.

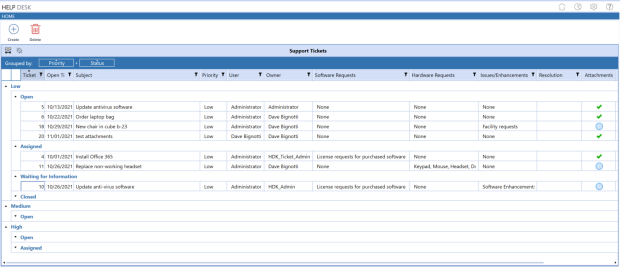
Any column or combination of columns can be used. For example, to group tasks by Priority and Status, first drag the Priority column header up to the bar at the top of the grid, then do the same with the Status column header. Dragging and dropping any column header to this area changes it to the Grouped by bar and displays the column header names that you drop into it.
The Support Tickets grid shows tasks grouped first by Priority, then by Status.
Column groupings are updated and display as soon as the column is dropped into the bar. When more than one grouping is used, groupings display as nested within its higher-level grouping.
Expand or collapse grouped items by clicking the Expand and Collapse widgets on the top left of each grouping.
Any column groupings you make are retained between Help Desk sessions. Groupings stay in place until you change them or remove them.
To remove a grouping, hover over the column group you want to remove, then click the x that appears in the group box. You can also click the column group header in the Grouped by bar and drag it anywhere outside of the bar to remove it. Removing all groupings restores the list to its original state.

You can also change the list of items within groupings between ascending order and descending order by clicking the ascending/descending widget on the top of the column group box.
When grouping grid items by multiple groups, you can also easily change grouping hierarchy by dragging and dropping a grouping box to the desired grouping level.
